The entry point for SmartEdit Writer is the Project Manager which you access from the icon on your desktop. From the project manager you can open a recent project, create a new project, or browse to a project not shown in the recent list — on a thumb drive for example.
I’ve kept the Project Manager as simple and clutter free as possible, as the main work of SmartEdit Writer is carried out inside each project. A few points to note. You cannot open the same project twice at the same time. You CAN have multiple projects with the same name. Only projects that are accessible will appear in the Recent Projects list — this means that if you opened a project from a thumb drive yesterday, and the drive is unplugged today, it will not appear in the list. Plug the drive back in and use the Open Project button.
A sample Huckleberry Finn project is included with each installation. Click on the project name in the Project manager to see what it’s all about.
The main SmartEdit Writer window has three sections: the Document area to the left, which contains your folders, chapters, scenes and notes, as well as a Fragments section where you store old or misplaced scenes; the tabbed word processor in the centre; the Research and Notes section to the right. Left and right sections can be closed to free up more space for writing.
The Document tree is where you organise your project. Here you add new scenes, attach notes to scenes or folders, and reorganise a project by dragging and dropping scenes, folders and notes. It’s a fluid design, which means you decide what kind of structure you want to have. In the Huckleberry Finn project, each chapter is given a folder, and scenes exist within that folder. Notes hang off anything, even each other.

There are some restrictions. You can’t add a scene or folder to a note, but you can add a scene to another scene. It all comes down to how you want to lay out your work and what suits your way of working.
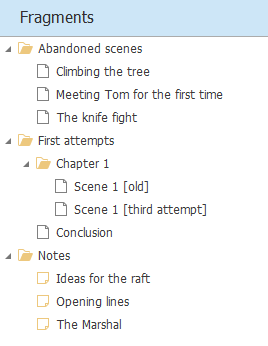
The Fragments tree is where you send scenes or notes that you do not want to use in your main Document, or that you may wish to use later. Basically, bits of scenes, dialogue, or prose that might be useful down the road. You send a scene, folder or note to Fragments by using the Move to Fragments button, or from the right click menu. You open the Fragments tree from the toolbar button. A reverse, Move to Document exists on the Fragment tree that allows you to send that scene or note back to the Document tree when its time has come.

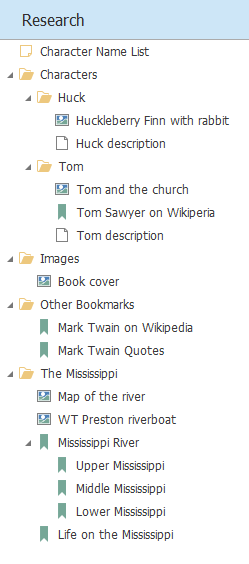
The Research tree, introduced in version 2, is where you store information that you collect as you work. You can add images, external files, links to websites and web pages — anything that has relevance to your work-in-progress. Double clicking on any of these files will open that file, image or website immediately.
The Research tree is a good place to store your outlines and character sheets. As with the Document and Fragments trees you can create folders, and add scenes and notes.

The word processor in the centre contains basic word processing functionality. Its menu ribbon is similar to Word’s, but lighter. All the usual Word shortcuts will work here, and many options not visible on the menu toolbar will still work if you remember the Word shortcuts.
When you re-open a project, scenes that were previously open will be opened again in the same order, so you can get back to work straight away.
Notes are everywhere. They can be attached to your Document, to folders, to scenes, to other notes, to fragments, to anything. A note is designed to hold a small amount of text, though it does use the same word processor as scenes, allowing you to use bullet lists and text formatting if you wish. Notes open to the right of the word processor, in a list that can be expanded or collapsed. A note can be resized, which means you can have three or four notes visible at the same time as you work on your scene: a brief synopsis, some character descriptions, a couple of sentences you want to use later, whatever takes your fancy.

As with the tabbed word processor, any note that was open when you last opened the project will be open when you re-open a project.
The combination of Document tree, tabbed word processor and notes is what makes SmartEdit Writer what it is. Yes, there will be more features added over time, but it’s this core feature set and the easy interaction between them that makes SmartEdit Writer such a productive tool for writers.
And there’s more. Autosave is automatic — you don’t get a choice here. SmartEdit Writer will save everything every minute or so, which means the prospect of losing work due to a system crash is small. Each scene is stored in a separate file, making the likelihood of damaging an entire document due to corruption — which can happen with Word — remote.
Automatic backups happen every time you close a project — be sure to configure this when you start using SmartEdit Writer.

Proper handling for curly quotes, em dashes and ellipsis is built in. Even in Word it can be difficult getting something as simple as em dashes to display, not to mention ellipsis. In SmartEdit Writer, two hyphens produce an em dash, and three periods an ellipsis, unless you choose to switch this off in Settings.
Exporting a combined, complete document is a single click process. The export feature will combine all scenes in your document, in order, from top to bottom, into a single Microsoft Word document. Fragments and notes are not included — only the scenes that sit in your Document tree. This is an area that will be improved over time, but it was important to get at least a rudimentary export option in place for the early versions.

Recent version of SmartEdit Writer introduced new features such as a daily word count record, a Dark Theme and a Character Name Generator.
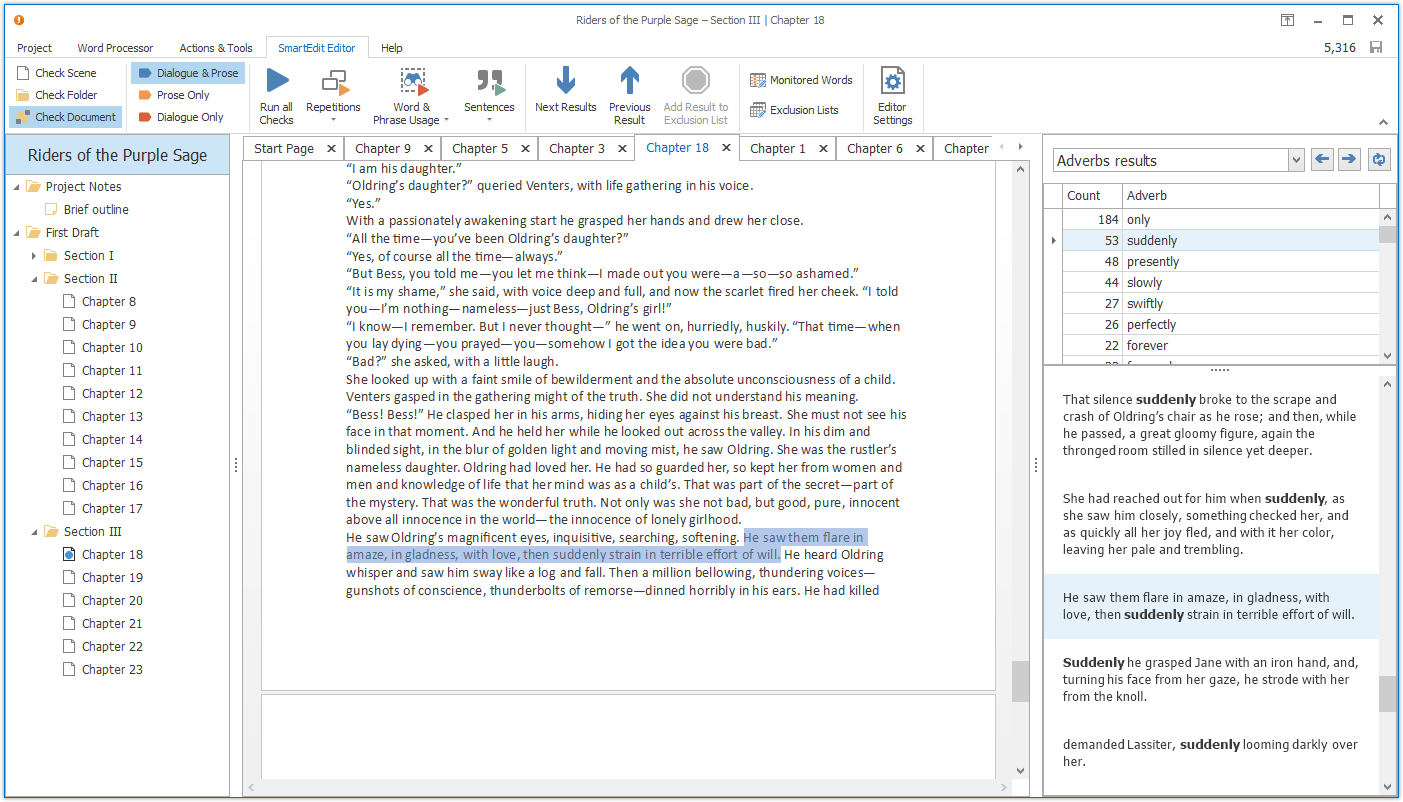
Version 7, released in April 2019, brought the full editing power of SmartEdit for Word into SmartEdit Writer. Editor runs a series of checks on your entire document and highlights areas that you might want to look at. This includes:
- Monitoring word and phrase over-use
- Highlighting adverbs, dialogue tags and redundant words
- Zooming in on punctuation issues
- Identifying long sentences
- Spotting misplaced proper nouns
- Allowing you to easily monitor your crutch words
You can run these checks as a whole on your entire document or individually against a single scene. It all depends on how you work and how you prefer to edit. Select the SmartEdit Editor toolbar and click on the check you want to run.
New releases of SmartEdit Writer are frequent. Keep an eye on the forum for news and discussion on upcoming changes.


