A SmartEdit Writer project is not a single document. This is a point that I repeat a lot throughout this Knowledge Base and reiterate in blog posts on a regular basis. Your SmartEdit Writer project is a collection of small documents and files, all bound together by a simple database. Finding something in your project is not as simple as running a basic Find operation in another word processor, but once you understand the three different types of search, you’ll find it to be fast and easy to understand.
What can your search for?
You can search for a word or phrase and you can search for an item (scene, note, image, bookmark or file) by name. You can search inside the currently open and active scene or note, you can search across all scenes and notes, and you can search by name inside the currently active tree (Document, Fragments or Research tree).
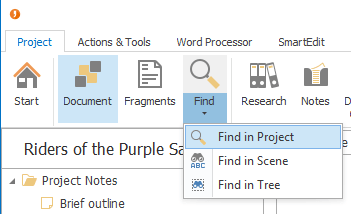
To choose a search type, click the drop down under the Find button on the main toolbar and choose from the three options.

Searching inside the current scene or note
This opens a standard and easily recognisable Find dialog where you can enter the text you are looking for and choose from a limited range of searching options. Only the currently active scene or note is searched. This operation looks and behaves similar to Find operations in other word processors, and is similar to the Microsoft Word Find in older versions of the software. The F3 shortcut key will allow you to jump to successive instances of the word or phrase you’re searching for.

Searching across your entire project
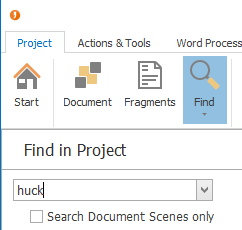
The global search was introduced in version 2 and combines some of the functionality common in recent versions of Word with some extra bits and pieces. It is accessible from the main Find button and from the Ctrl+Shift+F shortcut keys. A new section will open to the left of the word processor replacing whichever tree was previously open.

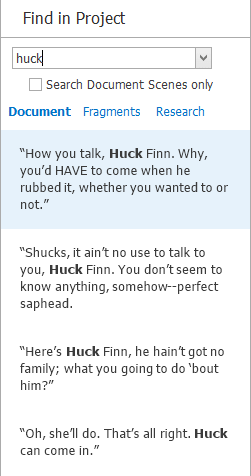
It looks basic, displaying a simple textbox and a single checkbox. To get started type your word or phrase into the textbox and hit the enter (return key). The search will begin immediately and you should start seeing results as soon as they are found. Unlike the more basic Find discussed previously, the project level find opens every scene and note in your project — regardless of which section it might be in — and searches for each occurrence of the specified word or phrase. It then displays a result list that comprises the paragraph containing the search phrase, with the phrase highlighted in bold.

The above screenshots shows the results after searching for “Huck” in the sample Huckleberry Finn project. Selecting any one result will immediately open that scene or note and jump to the first occurrence of the search phrase in that paragraph.
At the top of the results list are three links: Document, Fragments and Research. Clicking any one of these will change the results list to show only those results from a particular section of your project. The default section is the Document tree, as these are the results most commonly sought.
What if you don’t want to search inside everything in your project? You may only wish to look inside your Document scenes, as these are the scenes that form part of your final manuscript. To only look inside these scenes, check the “Search Document Scenes only” checkbox and re-run the search.
The project search results list is structured in such a way that you can see the context of each result before deciding to open the scene or not. If you are looking for a particular instance of the search phrase, a quick eyeball of the results list is usually sufficient to locate the single instance you’re looking for, at which point you can click on the result, open that scene and make whatever changes you need to make.
Searching by item name
What if you’re not looking for a word or phrase within a scene? What if you you’re looking for a scene somewhere on your Document tree that you named “huck …?” As your project grows you may find that you have hundreds of scenes, notes and folders in your project, many with similar names.
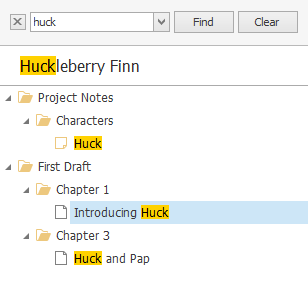
From the Find button drop down, select Find in Tree. This will open a search box at the very top of the active tree (Document, Fragments or Research). The Ctrl+F shortcut keys will also work as long as the tree is currently selected. All you have to do is begin typing and the tree will be filtered based on the characters you type in. For example, typing “Huck” into the search box for the Document tree in the Huckleberry Finn project will give three results as shown below, inside their parent folders for context.

You may need to open any closed folders if you can’t see the item, and you can close the results tree and return to the full Document, Fragments or Research tree by clicking the Close button next to the search box.
These three different types of search cover all of your project and allow you to quickly find anything you’re looking for, either by word or phrase, or by name.
