The Word Processor in SmartEdit Writer has all of the basic and mid-level features that you would expect from a word processor such as Microsoft Word. Many of these features are accessible only via shortcut keys — the same shortcuts as Word. They do not all appear on the toolbar.
What I tried to do with the word processor design is to limit the visible options to only the basics, all of which have a button on the main Word Processor toolbar. From here you can adjust the fonts, change text formatting to bold or italic, indent paragraphs, adjust line spacings — basic, everyday functionality that all users might use at one point or another. Icons for these buttons should all be familiar to you.

More advanced word processing features such as multi-level lists, advanced table designs and headers and footers are not available. The word processor has been designed with creative writers in mind. Features mentioned above are rarely, if ever, used by fiction writers, at least in the initial draft stage.
While it’s true that a polished manuscript that you are sending to a publisher might need headers and page numbers, unusual formatting, and even the ability to track changes, SmartEdit Writer does not contain any of these. When you reach the polishing and formatting stage, you need to look to a more suitable tool such as Word.
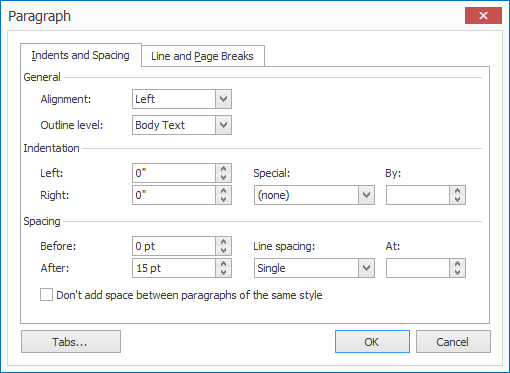
So what does the SmartEdit Writer word processor allow? Text justification, underlining, simple bullet and numbered lists, font and colour changes, copy and paste — with a Paste Special option so that you can paste without any formatting — simple tables and image insertion, as well as full paragraph spacing options, accessible from the paragraph button on the toolbar and the right click Paragraph option.

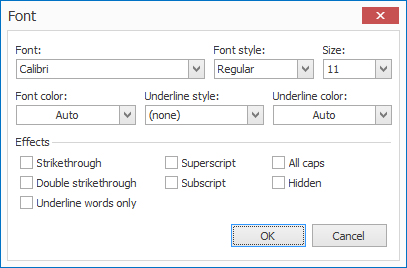
You’ll also find a dialog containing the full range of Font options by using the Ctrl+D shortcut, and a Find and Replace dialog, accessible from the toolbar buttons and the commonly used Ctrl+F shortcut.

You can Zoom in and out, making the word processor larger to suit your needs or screen resolution without adjusting the font size. The zoom feature is universal and applies to all open scenes and notes in the project. It is maintained after you close and re-open a project, allowing you to set up a working environment that fully meets your working style and requirements.
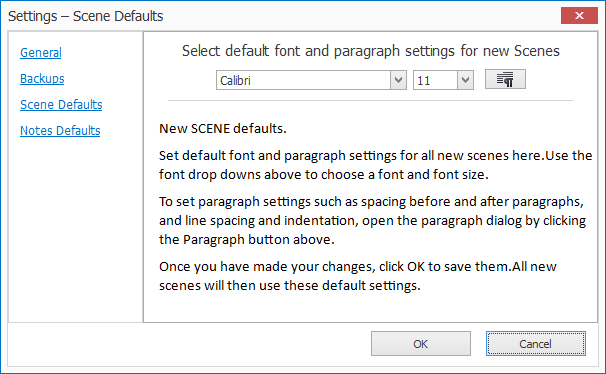
A number of options relating to the word processor are accessible on the Settings dialog (Actions & Tools toolbar). From here, you can set default font and paragraph settings for all new scenes and notes, as well as switch smart quotes and em dashes off or on.


A full spell checker exists for the English language and its regional variations. I go into that in detail in the next topic, but for the time being, be aware that the live spell checker (the red underline), can be switched on or off from the “Live Spelling” button on the word processor toolbar.
If you’re looking for an option in the word processor that you can’t find, don’t forget to try the shortcut keys that you might have used previously in your old word processor. There’s a good chance the feature is there, simply not accessible from the toolbar.
Word is a great word processor, but it’s overly complicated for creative writing, especially in the early stages. The multitude of options available can be a distraction for the writer at a time when getting words down on paper is what’s important. I’ve tried to eliminate this by cutting down on visible options, and showing only the basic, commonly used functionality on a single toolbar.
