SmartEdit Pro is no longer available for purchase
SmartEdit Pro is an expanded version of the SmartEdit for Word Add-In. It contains a number of extra features of use to professional editors. We define a professional editor as someone who edits the work of various different writers, often working on multiple books from assorted writers.
SmartEdit Pro contains report generating capabilities that allows you to generate Word and PDF reports based on the results generated by SmartEdit, as well as full report printing functionality. It also allows you to create Projects (one for each writer, book, or genré of book), and to apply different rules to these projects when running SmartEdit checks. More on this below.
The SmartEdit pro menu toolbar contains all the buttons and options you might be familiar with from SmartEdit for Word, along with “Create Report” and “Projects” sections.

A trial version of SmartEdit Pro is not available, but sample reports are shown and linked to below for you to download and examine. The sample reports are fully automated and contain no editing on our side — these are exactly the type of reports produced by SmartEdit Pro.
Creating Reports
Reports can be generated as Microsoft Word and PDF documents, as well as RTF, Open Office or older doc formats. You can generate a report for the current results list only (such as Adverbs or Repeated Words) or for all results lists combined.
Two report types exist, condensed and expanded. A condensed report contains the number of occurrences of a word or phrase alongside that phase, with an optional third column for any notes you might decide to enter. The expanded report contains the word or phrase alongside the full sentence or sentences that contain it. A range of options exist that allow you to configure your reports. You can choose to add a title page with your name, the name of the document you’re working on and your personal or business logo, and you can configure which columns appear in the condensed report.
Sample Reports
The sample reports below were all created after running SmartEdit checks on Zane Grey’s Riders of the Purple Sage.
For a full length novel, expanded reports can be very long and take some time to generate. Creating an expanded report containing all results for an 80,000 novel could easily run to over 5,000 pages — not a practical document at all.
For this reason, we advise only creating expanded reports for smaller, individual result sets such as Adverb or Sentence Length results. For most purposes the condensed reports are sufficient if you are looking to send them to a client.
Our second recommendation is to generate your reports as Word documents rather than PDF, as this will allow you to edit that report before sending it anywhere. For example: the expanded Sentence Length report will show you a list of each sentence in the document along with the number of words in that sentence. You might wish to remove entries in the table where the sentence length is less than 50 words, thereby sending a more practical document to your client, listing only extremely long sentences.
To create a report you must first run SmartEdit checks against your document. When the checks have competed and there are results to examine, open the Save Report drop-down button and select the type of report you wish to run. You can create a condensed, short report from the currently active results list or from all results, or you can create a fuller expanded report. If the length of your document is such that the expanded report might run to over 400 pages, you will receive a warning before continuing.
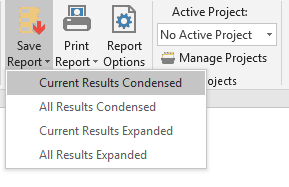
That’s all there is to it.
Printing Reports
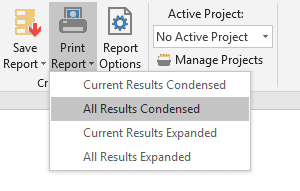
Printing a report works in the very same way as saving to Word or PDF and the same recommendations apply. You don’t want to print a 6,000 word document unless you have an abundance of paper and ink. You will see a print preview dialogue before the print action occurs, allowing you to see how long the report will be.
Report Options
A range of options exist that allow you to configure the appearance of your reports. Click on the “Report Options” button to open the dialog. The General Options page allows you to configure the appearance of the condensed reports and to specify what, if anything, appears on the report’s title page.
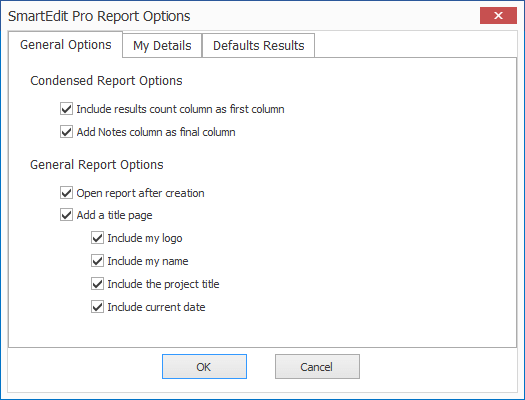
The first two options, “Include results count column as first column” and “Add Notes column as final column” allow you to specify the columns that appear in the condensed report. See the screenshot below. You may decide that the count column is unnecessary or that you have no notes to add, in which case you should switch them off.
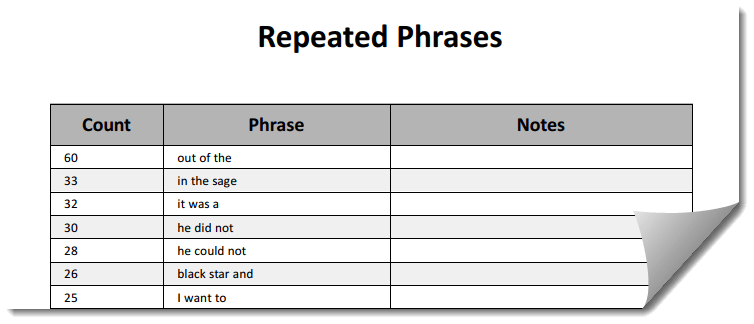
The notes column is especially useful if you wish to add you own notes or comments next to certain results. Creating the report as a Word document makes this easier, as you can open the report in Word after it is generated and type your notes directly into the table cell.
“Open report after creation” will open the document in Word or your PDF viewer after it is created.
The title page options are where you can specify whether or not a title page should be inserted into your reports and what should appear on that page. A few things to note about the title page: the Project Title is taken from the Word document name, so you should ensure that the Word document is properly named if you choose to use this option.
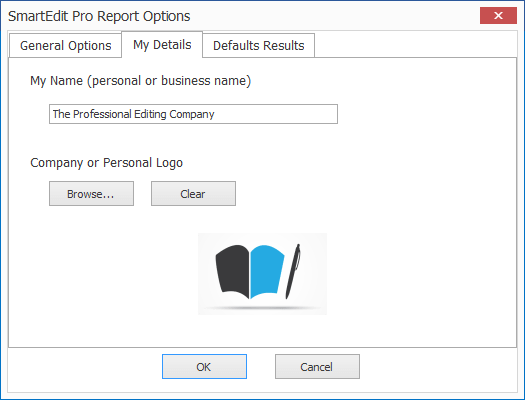
The Logo and Name values are configured on the second page of the options dialog — see the screenshot below. Here you enter your own name or the name of the business that you wish to appear on the report. If you have a logo, Browse to your file and add it here. A default logo is included with SmartEdit Pro, but this is for illustration purposes only. You should remove this or add your own before generating a report that includes a title page.
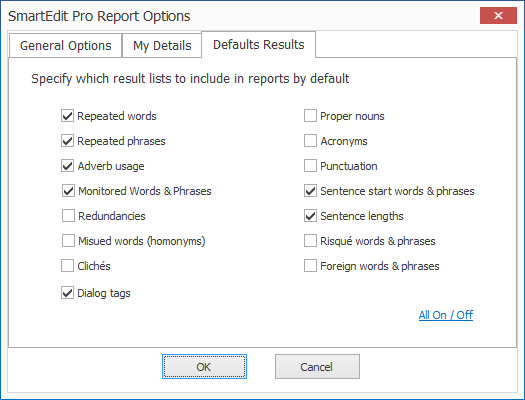
The final options page is where you can set default SmartEdit results sets that should always appear in full reports — either condensed or expanded. This is especially useful if you decide that certain results are not applicable or of value to your clients. In the screenshot below I’ve switched off a number of results.
SmartEdit Pro Projects
Projects are unique to SmartEdit Pro. A project allows you to specify Monitored Words and Phrases that are specific to that project and to exclude specific results from future checks for documents run through SmartEdit while that project is active.
A project may relate to an individual writer or to a type or book. You might use projects to help tailor your SmartEdit checks to the work of a particular writer, to a series of books, or to books and documents that meet a certain criteria or genré.
In the example below, I’ve created projects for two types of fiction and two writers. In the Medical Fiction project I might exclude certain medical words and phrases from the repetition results. Similar for the Legal Fiction project. In the case of an individual writer such as Zane Grey, I might add certain known crutch words and phrases that apply to that writer to the Monitored Words list so that I can keep an eye on them, but only for documents I’m editing for Zane Grey.
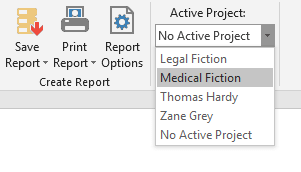
Once you have a project set up you can set that project as the active project by choosing it from the drop-down list. If you select
“No Active Project” from the list, then no extra lists are used when running your SmartEdit checks.

To create a new project or add to existing projects, click on the Manage Projects button on the SmartEdit Pro toolbar. The first time you open this dialog no projects will exist and Create New Project will be selected. Type the new project name into the input box and click the green arrow button to create it.
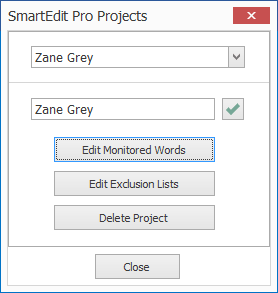
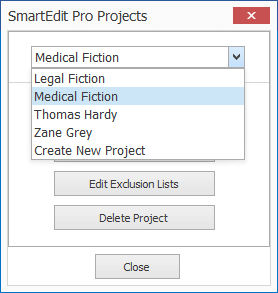
At this point the Edit monitored Words and Edit Exclusion Lists buttons will become enabled. Clicking any of these will open the familiar dialogs that you use to set Global monitored words and exclusion list items. The only difference is that these dialogs will be empty and anything you enter will be specific to that project.
A new page has been added to the SmartEdit Settings dialog where you can choose how the project lists are used when running SmartEdit checks. The default setting, “Use global lists and Active Project lists combined” is the default. This means that any project specific word you add will be appended to the current global lists when running SmartEdit checks.

The second option, “Use project lists only” will ignore the global lists and only use the project specific lists and the final option effectively switches off the project lists. This final option has the same effect as setting the active project to No Active Project.
Deleting a project will only delete the monitored words lists and exclusion lists for that project. It does not delete any documents or other files.
A new option has been added to SmartEdit Pro that allows you to add results to the exclusion list for the Active Project rather than to the global list. In the screenshot below, right clicking on suddenly presents two menu options. Choosing Add to Project Exclusion List will exclude the word suddenly from future results, but only for documents run for the Zane Grey project.
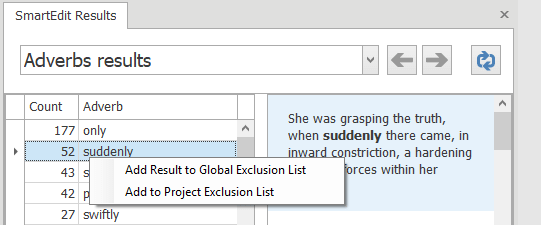
A new shortcut key of Ctrl+Shift+E has been added to make this option faster, complimenting the current Ctrl+E shortcut that adds a result to the global exclusion list.
The better you know the writer or the genré the better you will be able to construct and manage your projects.


